In this series, we’re going through the process of recreating a workflow similar to Heroku’s review apps for web applications using Kamal for deployments. The first article covered using Terraform to create the infrastructure for your apps through GitHub Actions, and the follow-up discussed how to use Kamal destinations to configure deployments to different environments. These two articles cover the foundation for our Kamal-powered review apps.
After creating new servers and configuring Kamal for the new environments, the next step is automatically performing deployments when opening or updating a pull request. Here is where everything begins to come together to have a usable system using your own infrastructure that you and your team can use to validate new functionality or bug fixes before merging into your main branch.
Following along with the series
During Part 1 of this series, we set up the TeamYap application with a GitHub Actions workflow file located at .github/workflows/review-app-deploy.yml. This workflow provisions the infrastructure to use for our future review apps when opening or updating a pull request.
I’ll add a new job to that workflow called deploy to handle the deployments using the new destination set up with Kamal and have it run on the ubuntu-latest GitHub-hosted runner as we do with the provision job.
I’ll also use the needs setting to indicate that it requires the provision job to finish successfully before attempting to run the deployment and ensure that the servers have been provisioned on our cloud service:
name: Review app deployment

on:
  pull_request:
    types:
      - opened
      - reopened
      - synchronize

jobs:
  provision:
    # Omitting provisioning steps

  deploy:
    runs-on: ubuntu-latest
    needs: provision

    # More configuration coming soon.
Next, I’ll begin setting up the environment variables needed for the deployment to complete successfully under the env key. For this step, we’ll need all the environment variables we configured for Kamal in the review destination configuration file and secrets (covered in Part 2 of this series). I’ll set most of the values of these environment variables as secrets in the GitHub repository:
name: Review app deployment

on:
  pull_request:
    types:
      - opened
      - reopened
      - synchronize

jobs:
  provision:
    # Omitting provisioning steps

  deploy:
    runs-on: ubuntu-latest
    needs: provision

    env:
      KAMAL_REGISTRY_PASSWORD: ${{ secrets.REVIEW_APP_KAMAL_REGISTRY_PASSWORD }}
      RAILS_MASTER_KEY: ${{ secrets.REVIEW_APP_RAILS_MASTER_KEY }}
      POSTGRES_USER: ${{ secrets.REVIEW_APP_POSTGRES_USER }}
      POSTGRES_PASSWORD: ${{ secrets.REVIEW_APP_POSTGRES_PASSWORD }}
      POSTGRES_DB: ${{ secrets.REVIEW_APP_POSTGRES_DB }}
      REVIEW_APP_IP: #???
      REVIEW_APP_HOST: #???
Naming convention used for secrets
As a side note, I’m appending REVIEW_APP_ to the name I set in the GitHub repository secrets to help me quickly view which secrets I’m using for review app deployments—you can name your secrets anything you prefer, as long as they’re set up correctly in the workflow YAML file.
Setting and Retrieving Outputs Between Jobs
The deploy job now has the environment variables it needs set, except for the REVIEW_APP_IP and REVIEW_APP_HOST variables. I can’t set these as a secret in the GitHub repository because these are dynamically generated values from our cloud service when provisioning the server using Terraform. How can we retrieve this information for the deployment?
In this scenario, we need to do two things:
- We need to output the server’s IP address using Terraform.
- We need to pass the output value from the
provisionjob to thedeployjob.
The Terraform script set up for this workflow in Part 1 already outputs the provisioned server’s IPv4 address, so we don’t need to modify it. That leaves us with passing that value over between jobs.
Defining an output to pass to a dependent job
GitHub Actions jobs are isolated from each other, so we can’t get this information directly from the provision job. However, we can output data from one job to make it available to a dependent job in the form of key-value pairs. We’ve set up the deploy job to depend on provision using the needs setting so we can pass the data we need between them.
First, I’ll need to update the provision job to include a step that will use Terraform’s output to retrieve the new server’s IP address and store it somewhere. Under the provision job, I’ll add a new step under the steps key to do this:
name: Review app deployment

on:
  pull_request:
    types:
      - opened
      - reopened
      - synchronize

jobs:
  provision:
    # Omitting setup

    steps:
      # Omitting existing steps.

      # New step: Outputting the IP address to use in the `deploy` job.
      - name: Set up Terraform outputs
        id: terraform-outputs
        run: |
          echo "review_app_ip=$(terraform output -raw ipv4_address)" >> $GITHUB_OUTPUT

  deploy:
    # Omitting current setup.
This new step will echo and append a string to the GITHUB_OUTPUT environment variable. GITHUB_OUTPUT is a special environment variable in GitHub Actions that allows us to take the data from one step available elsewhere in the job. GITHUB_OUTPUT accepts a key-value pair, so in this example, the key is review_app_ip, and the value is the output we get from the terraform output command.
When using GITHUB_OUTPUT in a step, it’s essential to include a unique identifier in the id key since we’ll need it to retrieve the data elsewhere in the job. I’ve identified this step as terraform-outputs, which I’ll use to retrieve the value of the review_app_ip key I set here.
As mentioned earlier, jobs in GitHub Actions can’t communicate with each other, so I need some way to make the IP address I stored in GITHUB_OUTPUT available to the deploy job. We can do this using the outputs setting in the job:
name: Review app deployment

on:
  pull_request:
    types:
      - opened
      - reopened
      - synchronize

jobs:
  provision:
    # New setting
    outputs:
      review_app_ip: ${{ steps.terraform-outputs.outputs.review_app_ip }}

    # Omitting the remaining provisioning setup and steps

  deploy:
    # Omitting current setup.
The outputs setting lets us make data available to dependent jobs through key-value pairs. Here, I’m setting the review_app_ip key to contain a value, which is the value of the review_app_ip key I set in the terraform-outputs step. Retrieving a value from GITHUB_OUTPUT takes the form of steps.<id>.outputs.<output-key>, where <id> is the step identifier and <output-key> is the key given to the string appended to GITHUB_OUTPUT.
These two updates to the provision job now give the deploy job access to the provisioned server’s IP address.
Retrieving the value of an output
To retrieve an output from another job, we can use the value in needs.<job-id>.outputs.<key>, as shown here:
name: Review app deployment

on:
  pull_request:
    types:
      - opened
      - reopened
      - synchronize

jobs:
  provision:
    outputs:
      review_app_ip: ${{ steps.terraform-outputs.outputs.review_app_ip }}

    # Omitting the remaining setup and steps.

  deploy:
    runs-on: ubuntu-latest
    needs: provision

    env:
      # Omitting existing environment variables and setting up new values.
      REVIEW_APP_IP: ${{ needs.provision.outputs.review_app_ip }}
      REVIEW_APP_HOST: ${{ needs.provision.outputs.review_app_ip }}
Outputs can only be passed between dependent jobs
When retrieving data from another GitHub Actions job through outputs, remember that it only works if the job fetching the data depends on the one providing the data via the needs setting. It’s an easy step to miss.
These environment variables will now contain the values from the key-value pair set up in the provision job. With this, I can set up the steps for deploying the application to the new server using Kamal.
Setting up Deployment Steps
The deployment job will consist of a few steps to set up the GitHub-hosted runner:
name: Review app deployment

on:
  pull_request:
    types:
      - opened
      - reopened
      - synchronize

jobs:
  provision:
    # Omitting provisioning steps.

  deploy:
    runs-on: ubuntu-latest
    needs: provision

    env:
      KAMAL_REGISTRY_PASSWORD: ${{ secrets.REVIEW_APP_KAMAL_REGISTRY_PASSWORD }}
      RAILS_MASTER_KEY: ${{ secrets.REVIEW_APP_RAILS_MASTER_KEY }}
      POSTGRES_USER: ${{ secrets.REVIEW_APP_POSTGRES_USER }}
      POSTGRES_PASSWORD: ${{ secrets.REVIEW_APP_POSTGRES_PASSWORD }}
      POSTGRES_DB: ${{ secrets.REVIEW_APP_POSTGRES_DB }}
      REVIEW_APP_IP: ${{ needs.provision.outputs.review_app_ip }}
      REVIEW_APP_HOST: ${{ needs.provision.outputs.review_app_ip }}

    steps:
      - name: Checkout repository
        uses: actions/checkout@v4

      - name: Setup Ruby
        uses: ruby/setup-ruby@v1
        with:
          bundler-cache: true

      - name: Configure SSH Key
        uses: webfactory/ssh-agent@v0.9.0
        with:
          ssh-private-key: ${{ secrets.REVIEW_APP_SSH_PRIVATE_KEY }}

      - name: Kamal setup
        if: github.event.action == 'opened' || github.event.action == 'reopened'
        run: bundle exec kamal setup -d review

      - name: Kamal deploy
        if: github.event.action == 'synchronize'
        run: bundle exec kamal deploy -d review
- I’ll check out the code from my repo into the runner using the
actions/checkoutaction. - Next, I’ll use the
ruby/setup-rubyaction to install Ruby and all the gem dependencies for the application. I do this step to use the same version of Kamal defined in my Gemfile.
Installing Kamal on your own
Instead of installing Ruby and the project’s gem dependencies, I can install Kamal separately or run Kamal through Docker as an alternative. However, I recommend using the same version you use in your project to ensure everything works with your current setup and avoid surprises when you have to deploy to production.
- The runner will also need an SSH key set up to perform the Kamal deployment. The webfactory/ssh-agent action helps us get this working quickly without the complexities around setting up SSH keys on the server.
- At this point, the server is ready for deployments, so we’ll add a few steps to run the initial Kamal setup command for the review destination (
kamal setup) if this is a newly opened or reopened pull request or a regular deployment (kamal deploy) when updating the pull request’s branch.
The first two steps are straightforward and don’t need much explanation. If you want to learn more about the actions used to check out the repo’s code and set up Ruby, I recommend reading through the documentation for each action to understand what’s going on in these steps.
Setting up an SSH Key on GitHub Actions for Deployments
Kamal uses SSH to connect to the servers it will deploy to and run the various commands it needs to get the application up and running. The server we spin up in this GitHub Actions workflow will automatically have our public SSH key, which I have configured in my Hetzner Cloud project, but the runner used for the deploy job won’t have its corresponding private SSH key, so it’s up to us to get it set up.
The webfactory/ssh-agent action used in the workflow performs all the actions needed to configure an SSH key for a GitHub-hosted runner. In most cases, we only need to supply it with a private SSH key, and the action takes care of the rest. Before this step works, we also need to handle some prerequisites on GitHub.
Generating a dedicated SSH key
While you can use your personal SSH key to set up this workflow, it’s highly recommended to create a separate key when setting it up on GitHub. It’ll help keep your systems secure if the key is ever compromised and makes it easier to control which repositories can access it without exposing other repos.
To learn how to generate a new SSH key, check out the Generating a new SSH key section in GitHub’s documentation. Make sure you save the keys in different files besides the default location so you don’t accidentally overwrite any existing keys in your system.
Adding the public SSH key as a deploy key
GitHub Actions will need the public SSH key configured in the code repository it will access so it knows that the workflow can perform deployments using that specific key. Otherwise, you’ll receive an error indicating it can’t read from the repo.
Setting up the public SSH key in a repository can be done by going to the Settings section in the repo on GitHub, going to Deploy Keys, and adding a new deploy key. Copy the value of the public SSH key as the deploy key’s value, and you’re all set.
Configuring the private SSH key as a repository secret
Configuring a deploy key on a repo attaches the public key, but we’ll still need the private SSH key on the server to perform the Kamal deployments. The secure way to handle this is to create a new repository secret that contains the value of the private SSH key. We can then refer to the SSH key without exposing its contents throughout the workflow process.
The Using secrets in GitHub Actions documentation explains how to create repository secrets. When creating the new secret, make sure to copy the entire private SSH key and not the public SSH key used previously—the value should start with -----BEGIN ... PRIVATE KEY----- and finish with -----END ... PRIVATE KEY-----.
Running Kamal Setup and Deploy
The GitHub-hosted runner is ready to use Kamal to deploy the application to the provisioned server. The final two steps in this workflow handle this, but each step is done conditionally depending on what triggered the workflow, whether when opening, reopening, or updating the pull request. Why do we have two distinct steps for handling the deployment conditionally?
The issue is that Kamal currently requires us to explicitly use the kamal setup command for the first deploy so it can install Docker if it’s not on the server, set up the accessories and the proxy service, and get the network working for our app. This step isn’t idempotent, meaning the command will fail if we attempt to re-run the kamal setup command after it completes successfully. Once we set up the server with Kamal, all subsequent updates need the kamal deploy command.
As a first pass to get our review app workflow running, I opted to create these two steps to distinguish when we need to run Kamal for the first time (opening or reopening a pull request, which provisions a new server) or update our application (when updating the pull request’s branch).
However, setting up these steps isn’t perfect. For example, if we open a new pull request and the deployment fails, we’ll need to re-run the kamal setup command again. The only way it’ll happen in our workflow is when the pull request is opened or reopened. We can’t push a fix to the branch since it’ll trigger the kamal deploy command, which will fail since the work didn’t correctly set up the server. The only way around this problem is to either manually complete the Kamal setup or close and reopen the pull request to delete the server with the incomplete setup and create a brand-new one.
Unfortunately, Kamal doesn’t offer a simple way to know if the Kamal setup command was successful. I’ll explore a few ways to work around this issue in a future article. For now, we’ll go with these steps instead.
Running Our First Kamal Deployment on GitHub Actions
The GitHub Actions workflow is fully ready to deploy our app to a fresh new server on the cloud (full YAML workflow). After committing these updates to the repo and double-checking that our repo has everything it needs (deploy key, secrets, etc.), we’ll open a new pull request and see what happens.
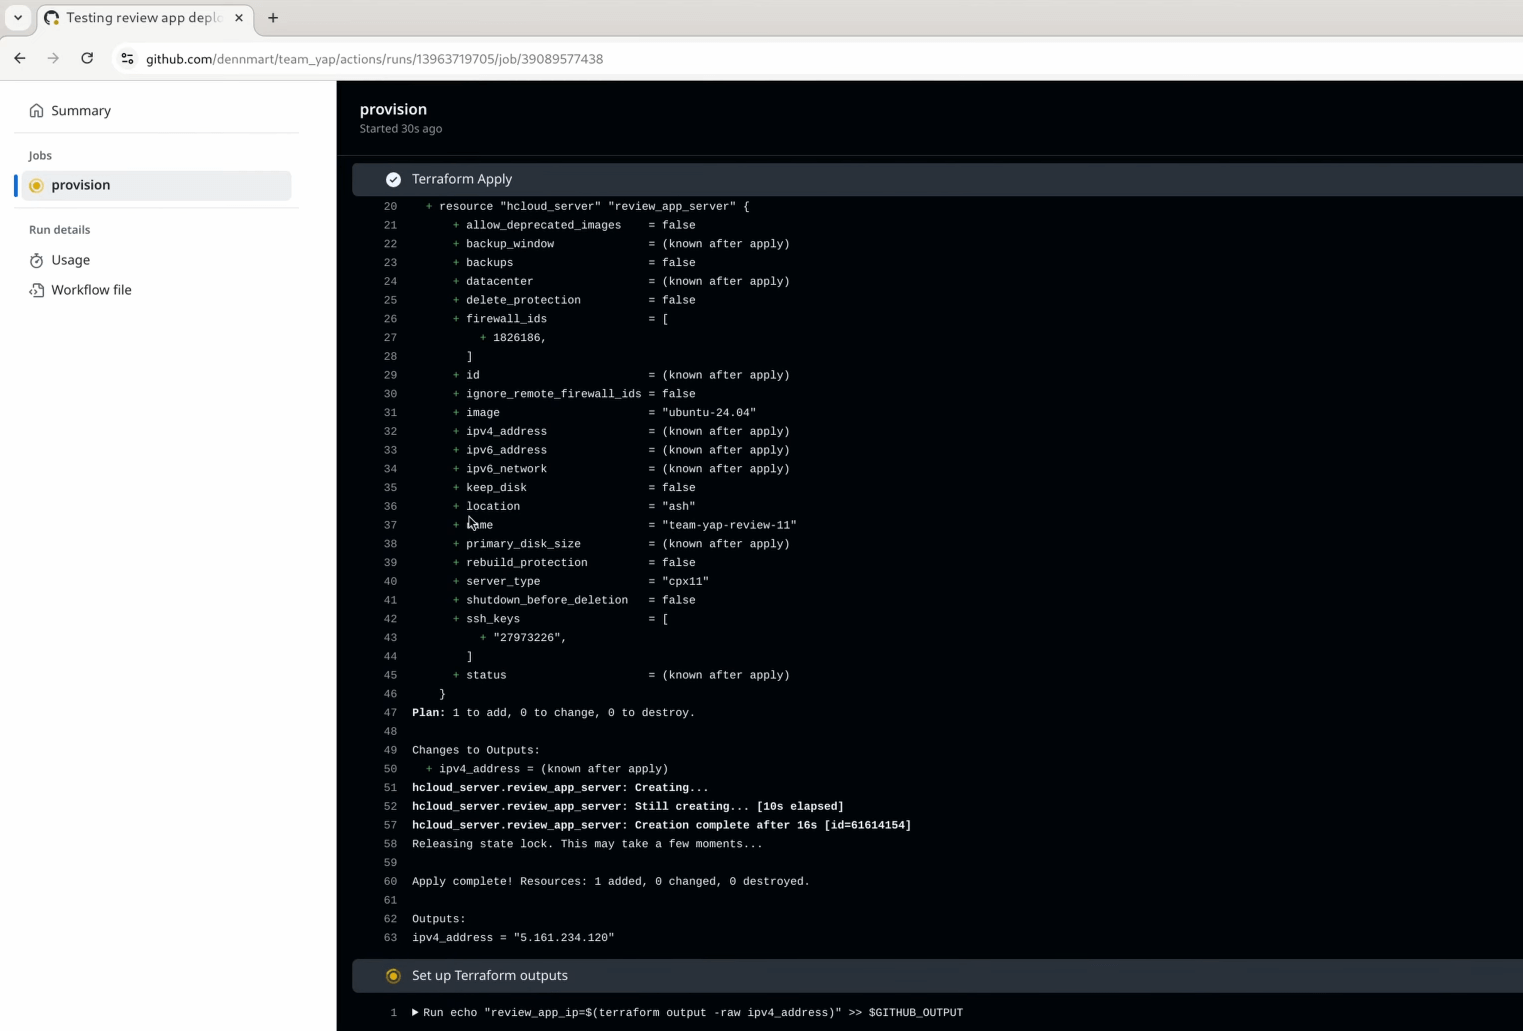
The provision job in the workflow will spin up the new server on Hetzner Cloud, as set up and shown in Part 1. The only thing that changed for this first job is configuring the job to store the new server’s IP address as an output. The new step saves the information to the $GITHUB_OUTPUT environment variable, making it ready to use in the deploy job.
After deploying the new server, GitHub Actions will kick off the new deploy job and go through each step after setting up the environment variables from the repository secrets and the output from the first job. It’ll set up Ruby and install the gems to ensure we have Kamal available, configure the SSH key on the runner, and run kamal setup on the review destination. If we’ve set everything correctly, the app will be up and running on the server in a few minutes.
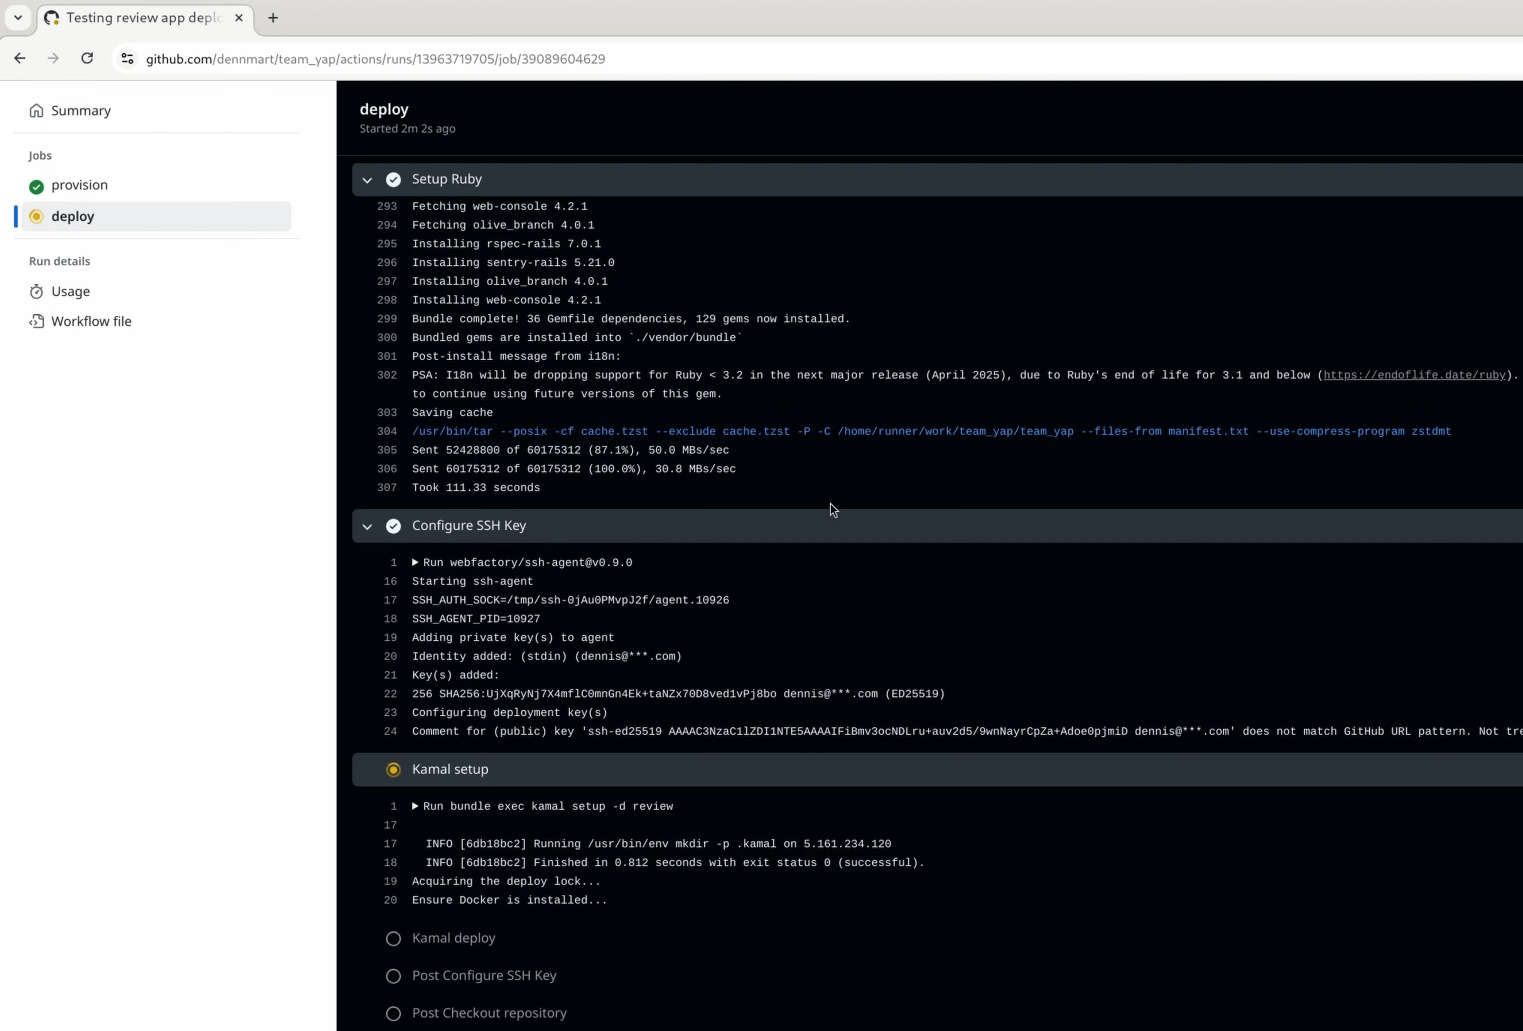
As we set up in the workflow, the deploy job will only execute the kamal setup step when opening or reopening a pull request, skipping the kamal deploy step when the pull request branch gets updated. Let’s double-check that the conditional checks work by updating the TeamYap codebase.
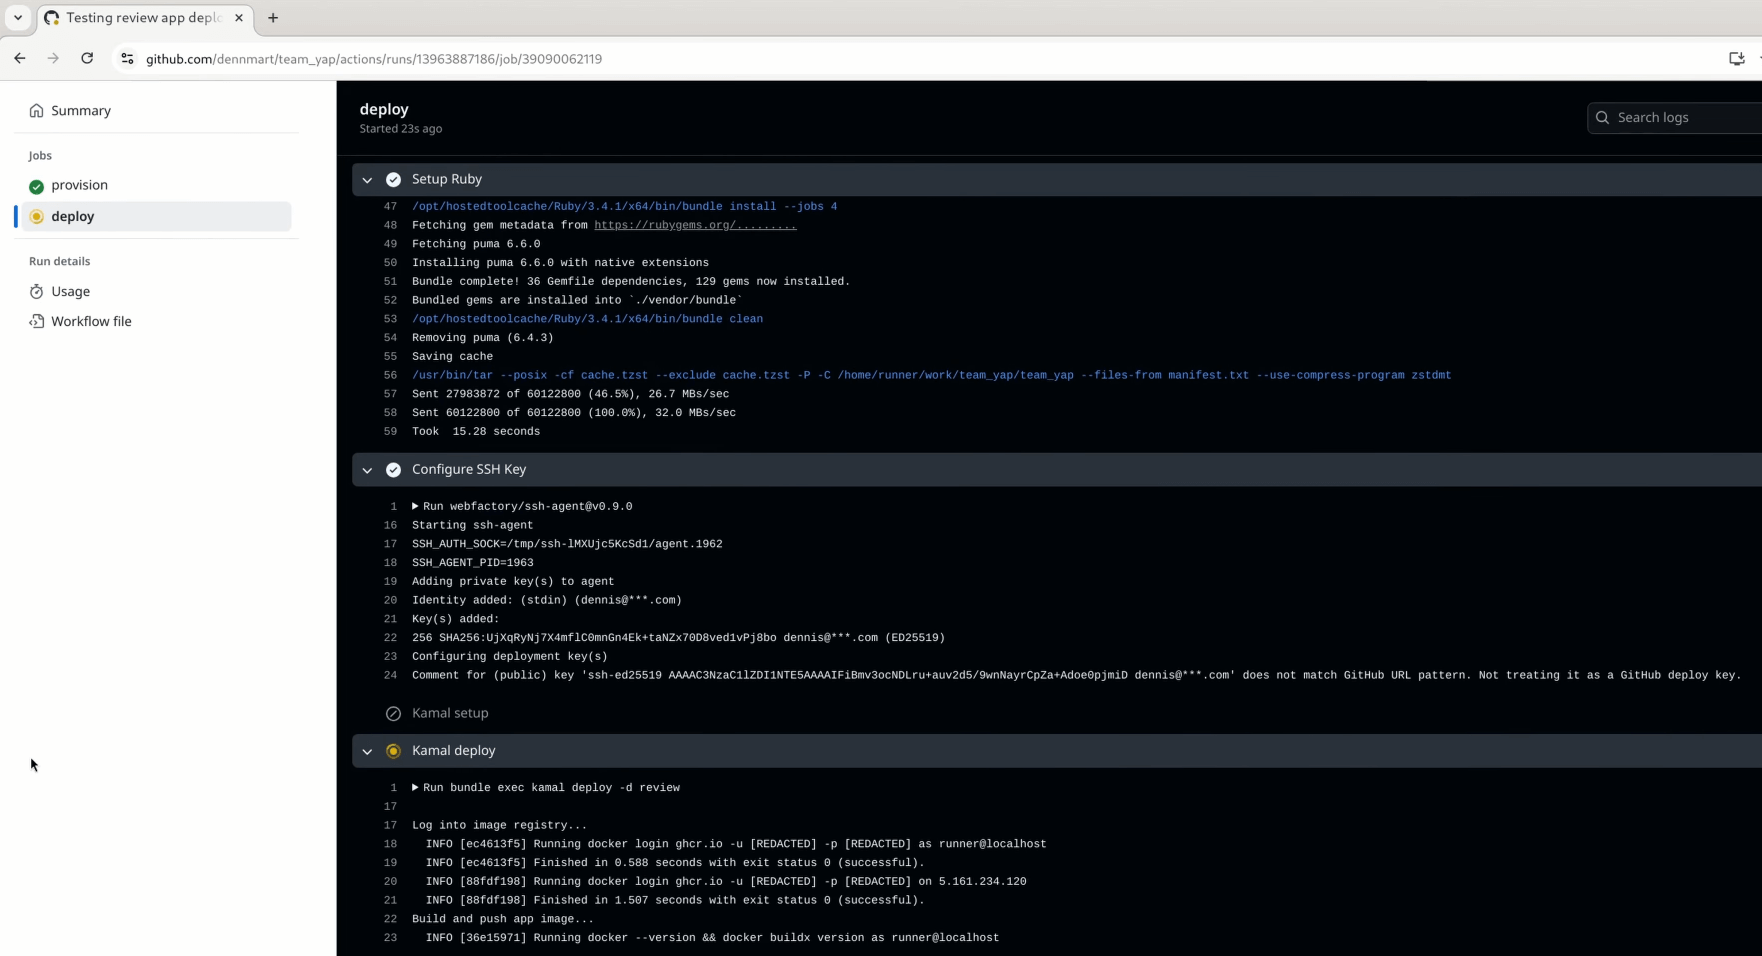
Let’s say I update the application’s dependencies, then commit and push these changes to the repo. This commit will trigger the workflow on GitHub Actions, going through the provision job again but making no changes since the server is already up and running for this pull request. It’ll then jump to the deploy job and run the kamal deploy step instead of kamal setup.
Wrapping Up
The work done in the previous parts of this series to spin up new servers and configure Kamal to split up the deployment settings for review apps finally got put to work, and we finally have fully automated deployments to newly provisioned infrastructure by simply opening or updating a pull request on GitHub. This step replicates what Heroku and other services do under the hood, with the benefit of giving you complete control of the underlying systems and deployment process.
Although we have functional deployments, our review app workflow is not quite there yet. Since the process spins up new servers on demand, we won’t know where the workflow deploys the application unless we skim through the workflow’s output and find the IP address. Doing this is a bit of a time-waster, so I’ll show how to create unique URLs for your review apps in the next article. Stay tuned!
Need help getting Kamal up and running for your web app?
If you or your team want hands-on assistance on automating Kamal deployments or need some help with any other Kamal or Rails-related setup, reach out with your questions and let's talk.
Screencast
If this article or video helped you with automating your deployments on GitHub Actions, consider subscribing to my YouTube channel for similar videos containing tips on helping Rails developers ship their code with more confidence, from development to deployment.